Why Spring Is the Best Time to Eat...
Rustic and nutritious, discover how Greece’s...
© Shutterstock
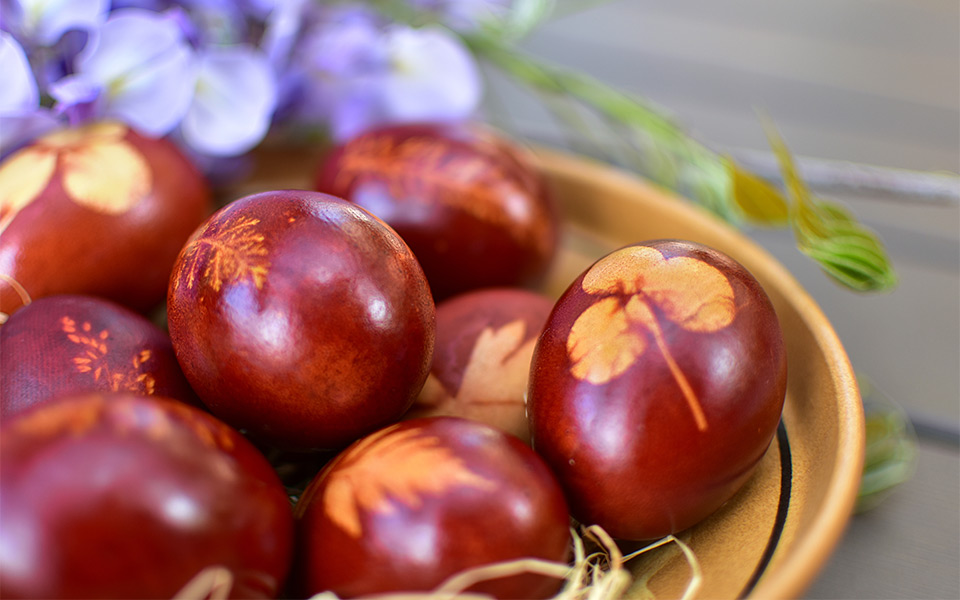
In Greece, Easter eggs are traditionally dyed red to symbolize the blood of Christ. Bowls of red eggs are set out in homes during the Holy Week, and after the Anastasi (the Resurrection of Christ, celebrated at midnight on the night before Easter Sunday) they are eaten with some fanfare.
The ritual is a game; people will try to crack each other’s eggs using their own, and whoever holds the last intact egg wins (see the rules to this seemingly banal, but often quite competitive and fun game here).
© Paulina Björk Kapsalis

© Paulina Björk Kapsalis
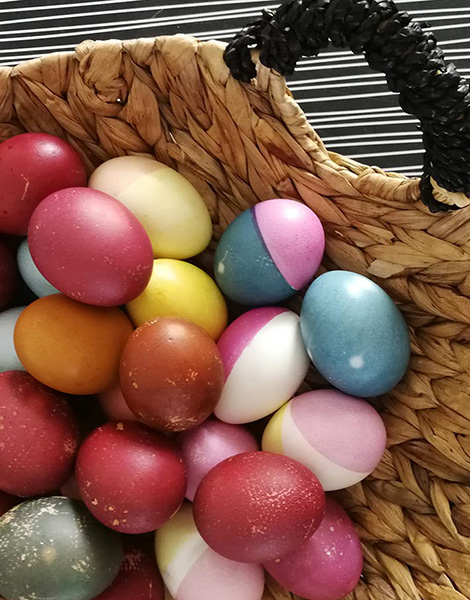
While tradition calls for red eggs, thanks to influences from abroad (and Pinterest), other colors have also been showing up on Greek Easter tables lately. And some crafty home economists have taken to making their own dyes using vegetables – an alternative that seems both healthier and, honestly, more fun than using the chemical-rich kits sold at the supermarkets.
But can you really get decent results using only vegetables? Or will you end up with the dyed egg version of a veggie-burger – certainly a healthier alternative but ultimately a fun-sapping disappointment. I decided to test run four variations of homemade dyes and see which work (so you don’t have to).
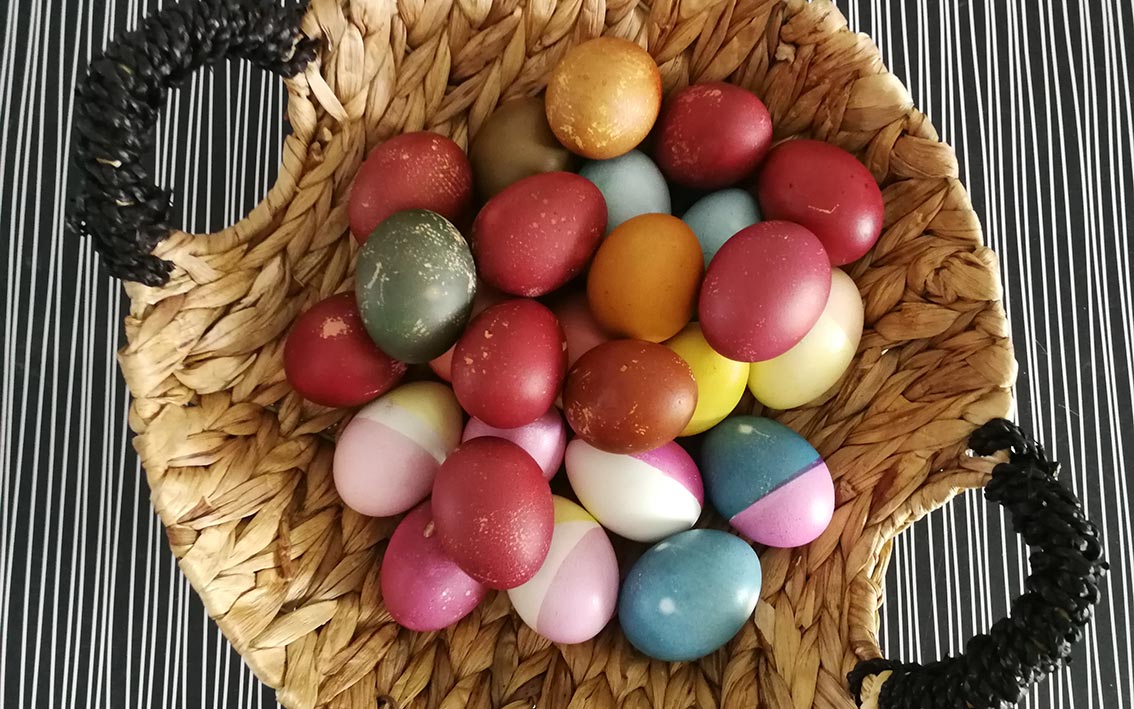
© Paulina Björk Kapsalis
The internet and my mother in law suggest that: onion peel dye and beet dye should turn the eggs red or pink, cabbage dye should turn them blue, and turmeric dye should turn them yellow.
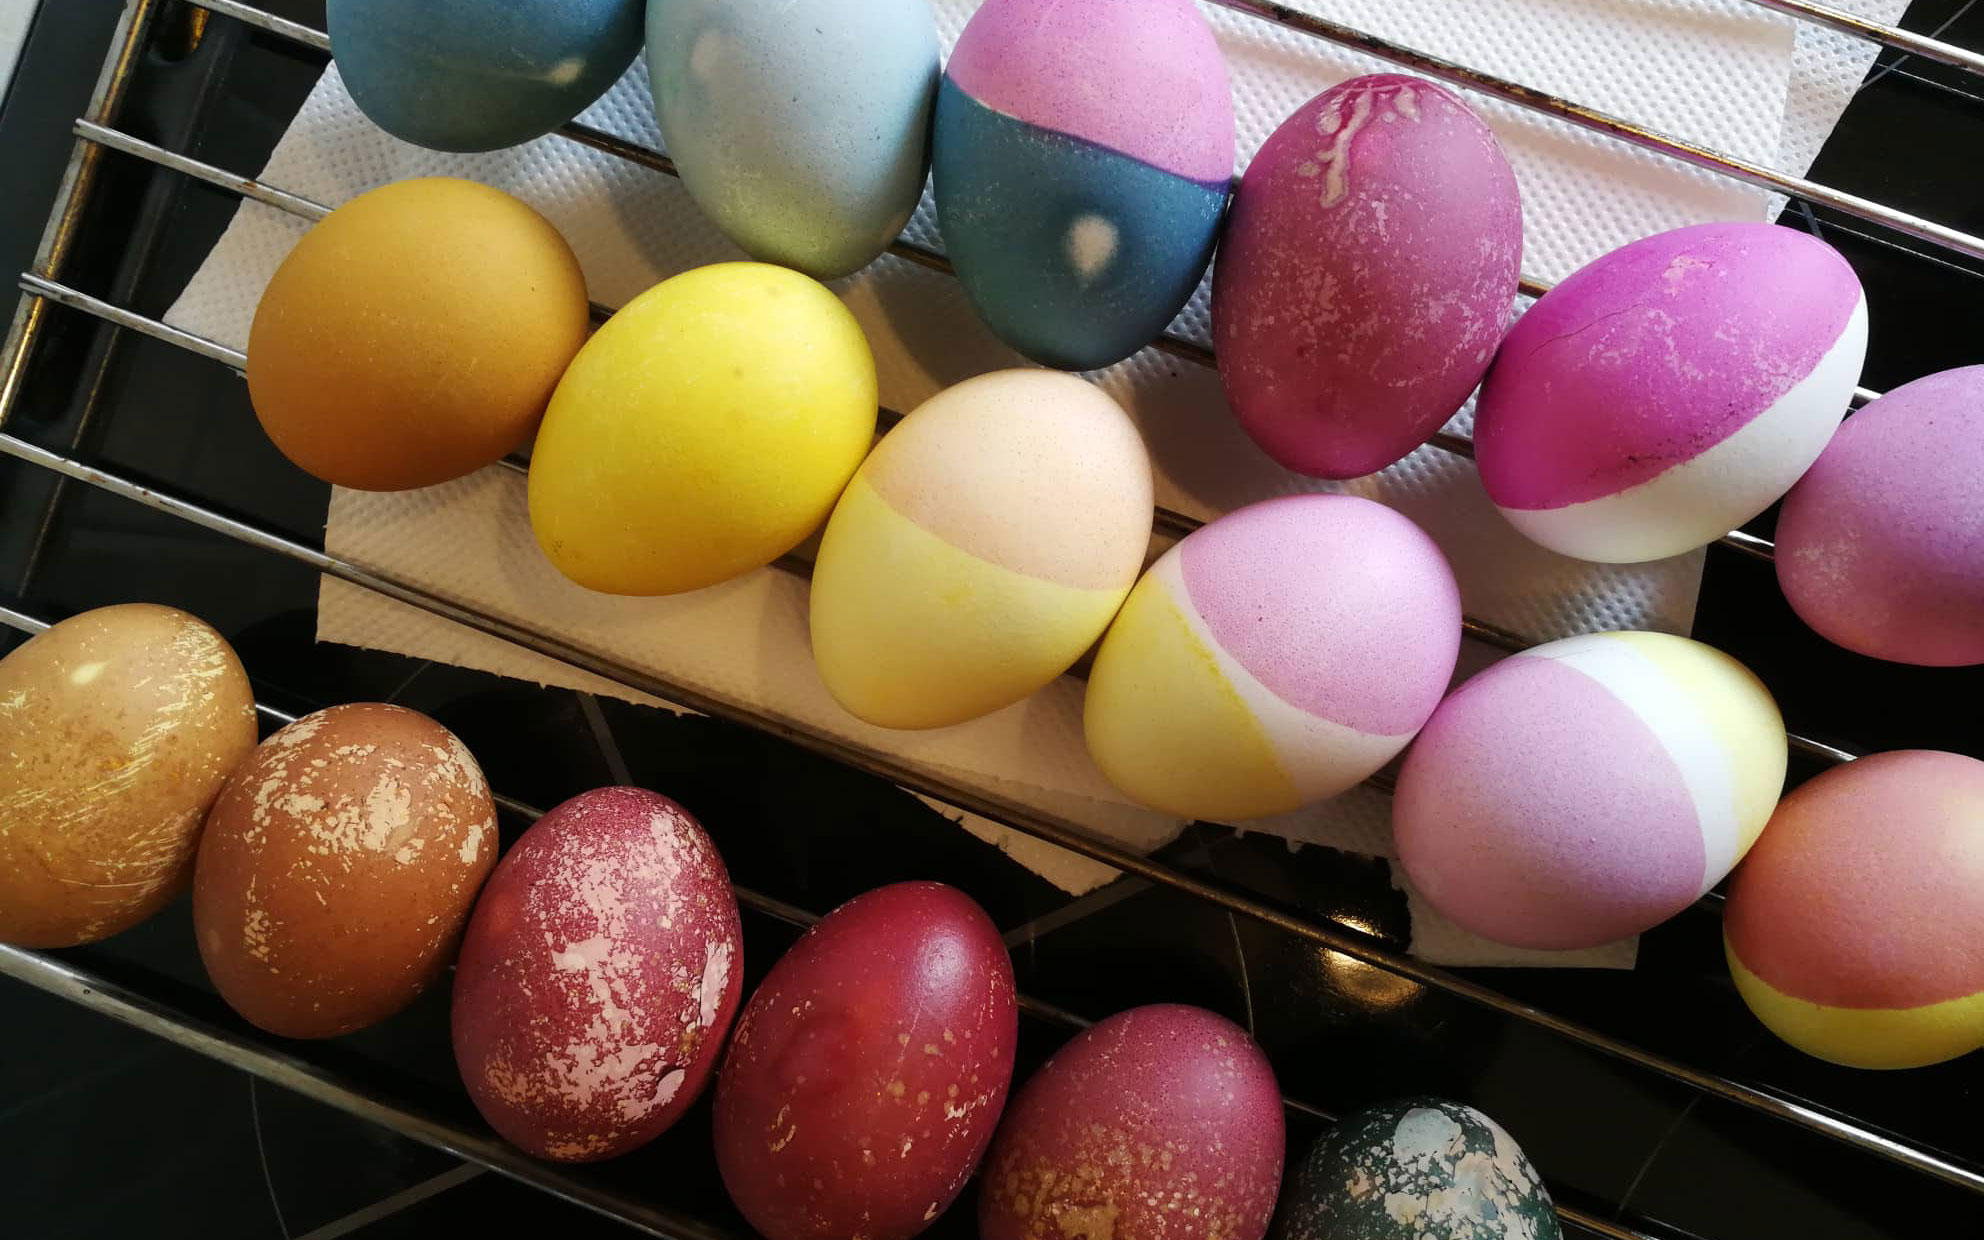
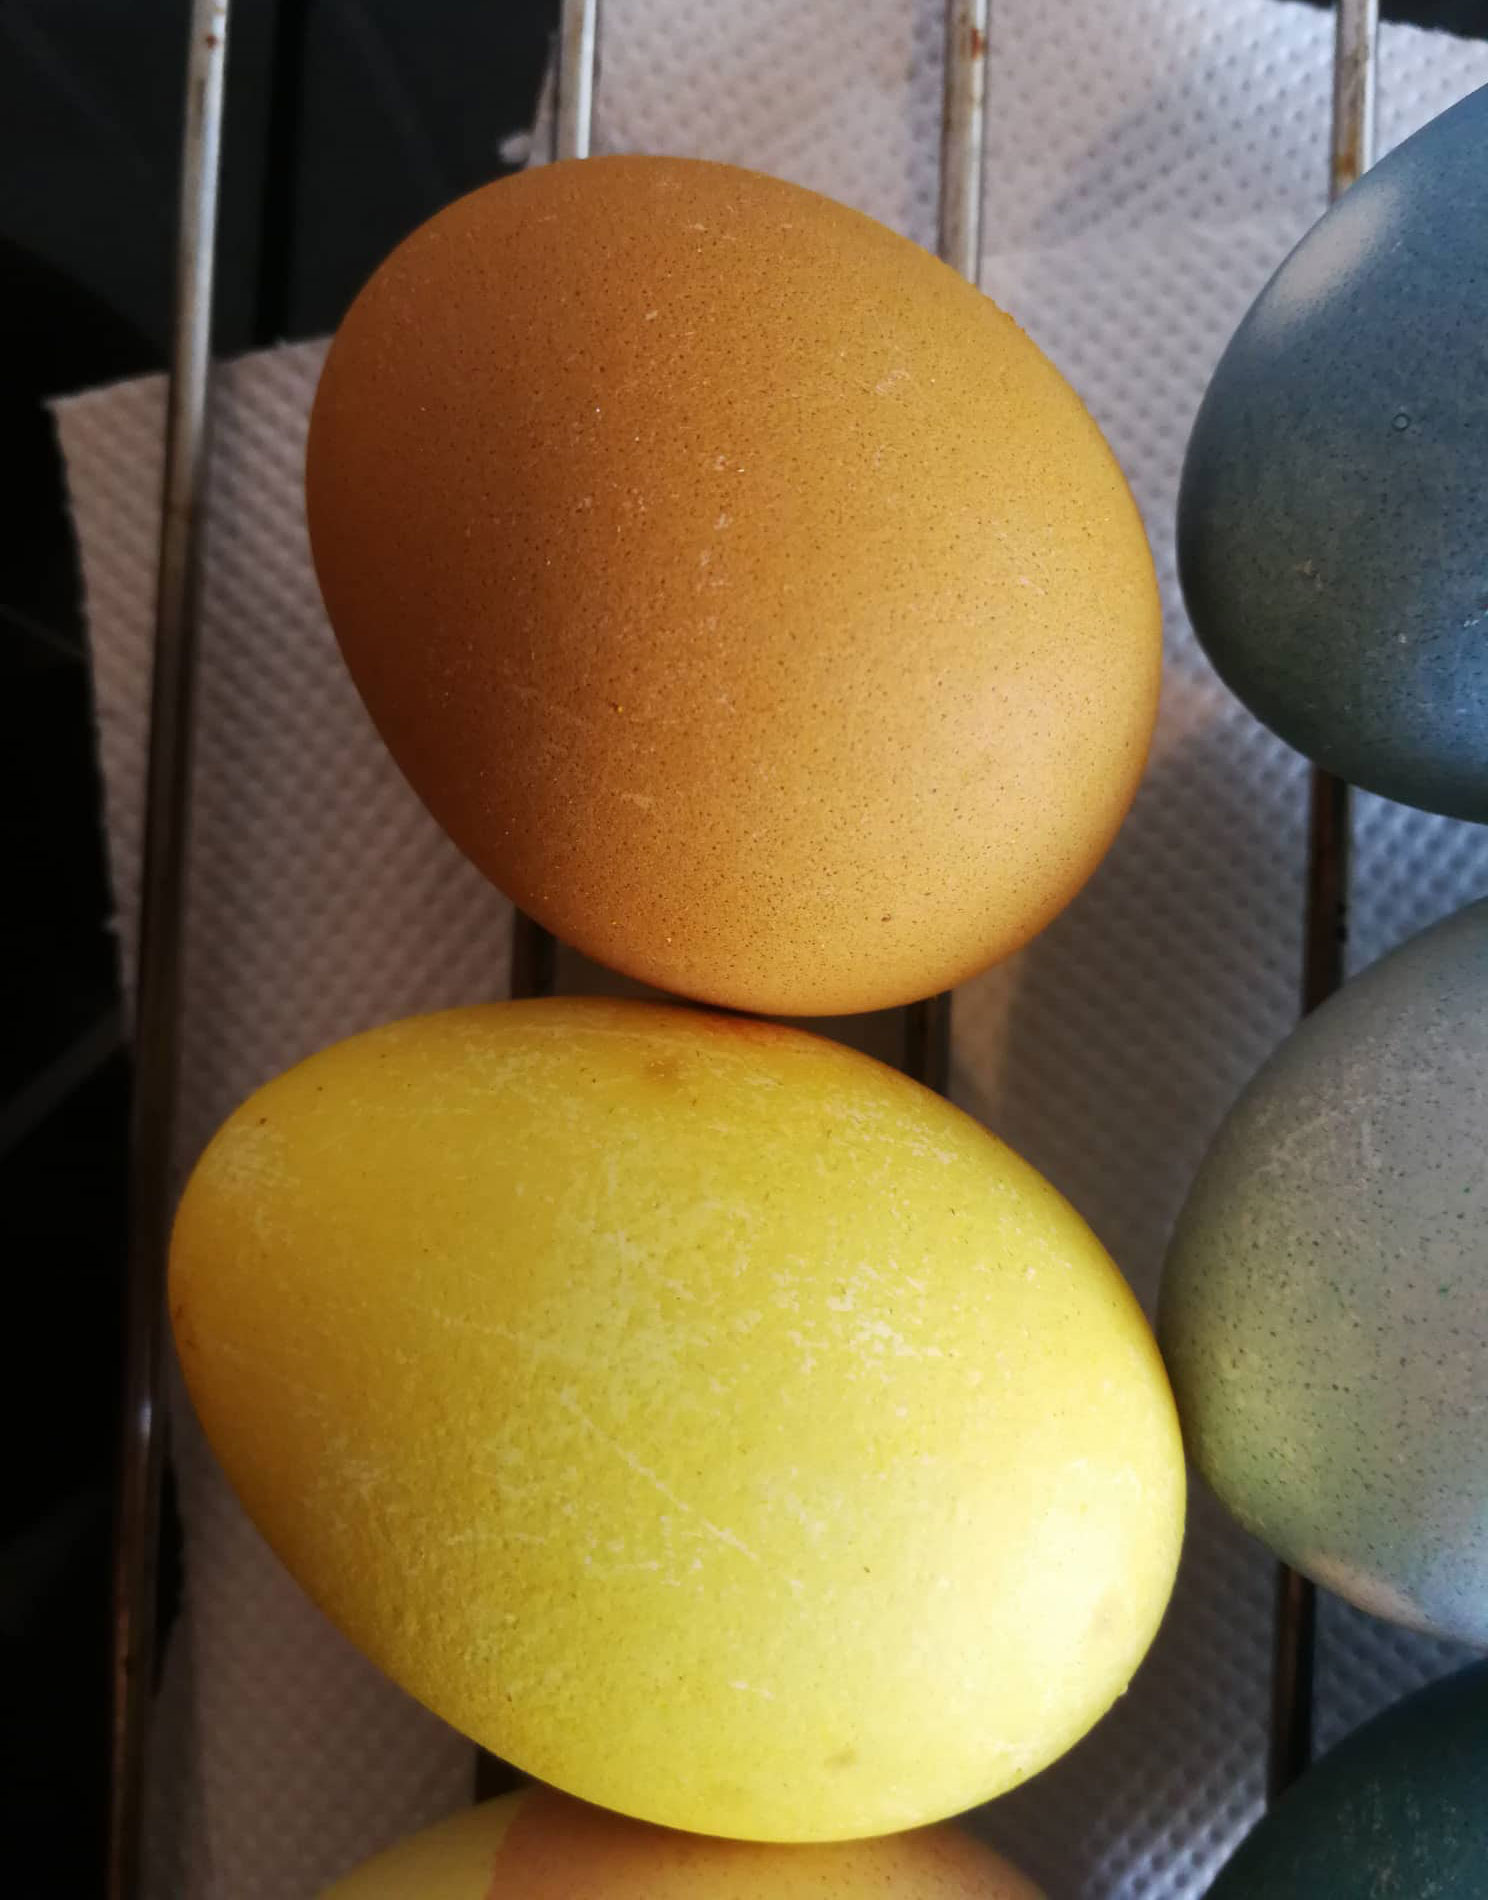
I chose to use the dyes on both white and brown eggs, to get as many color variations as possible. I expected the brown ones to turn gorgeous deep colors, and the white ones to get lighter, pastel shades, and I was kind of right. What I didn’t expect was the amount of variations I would actually get.
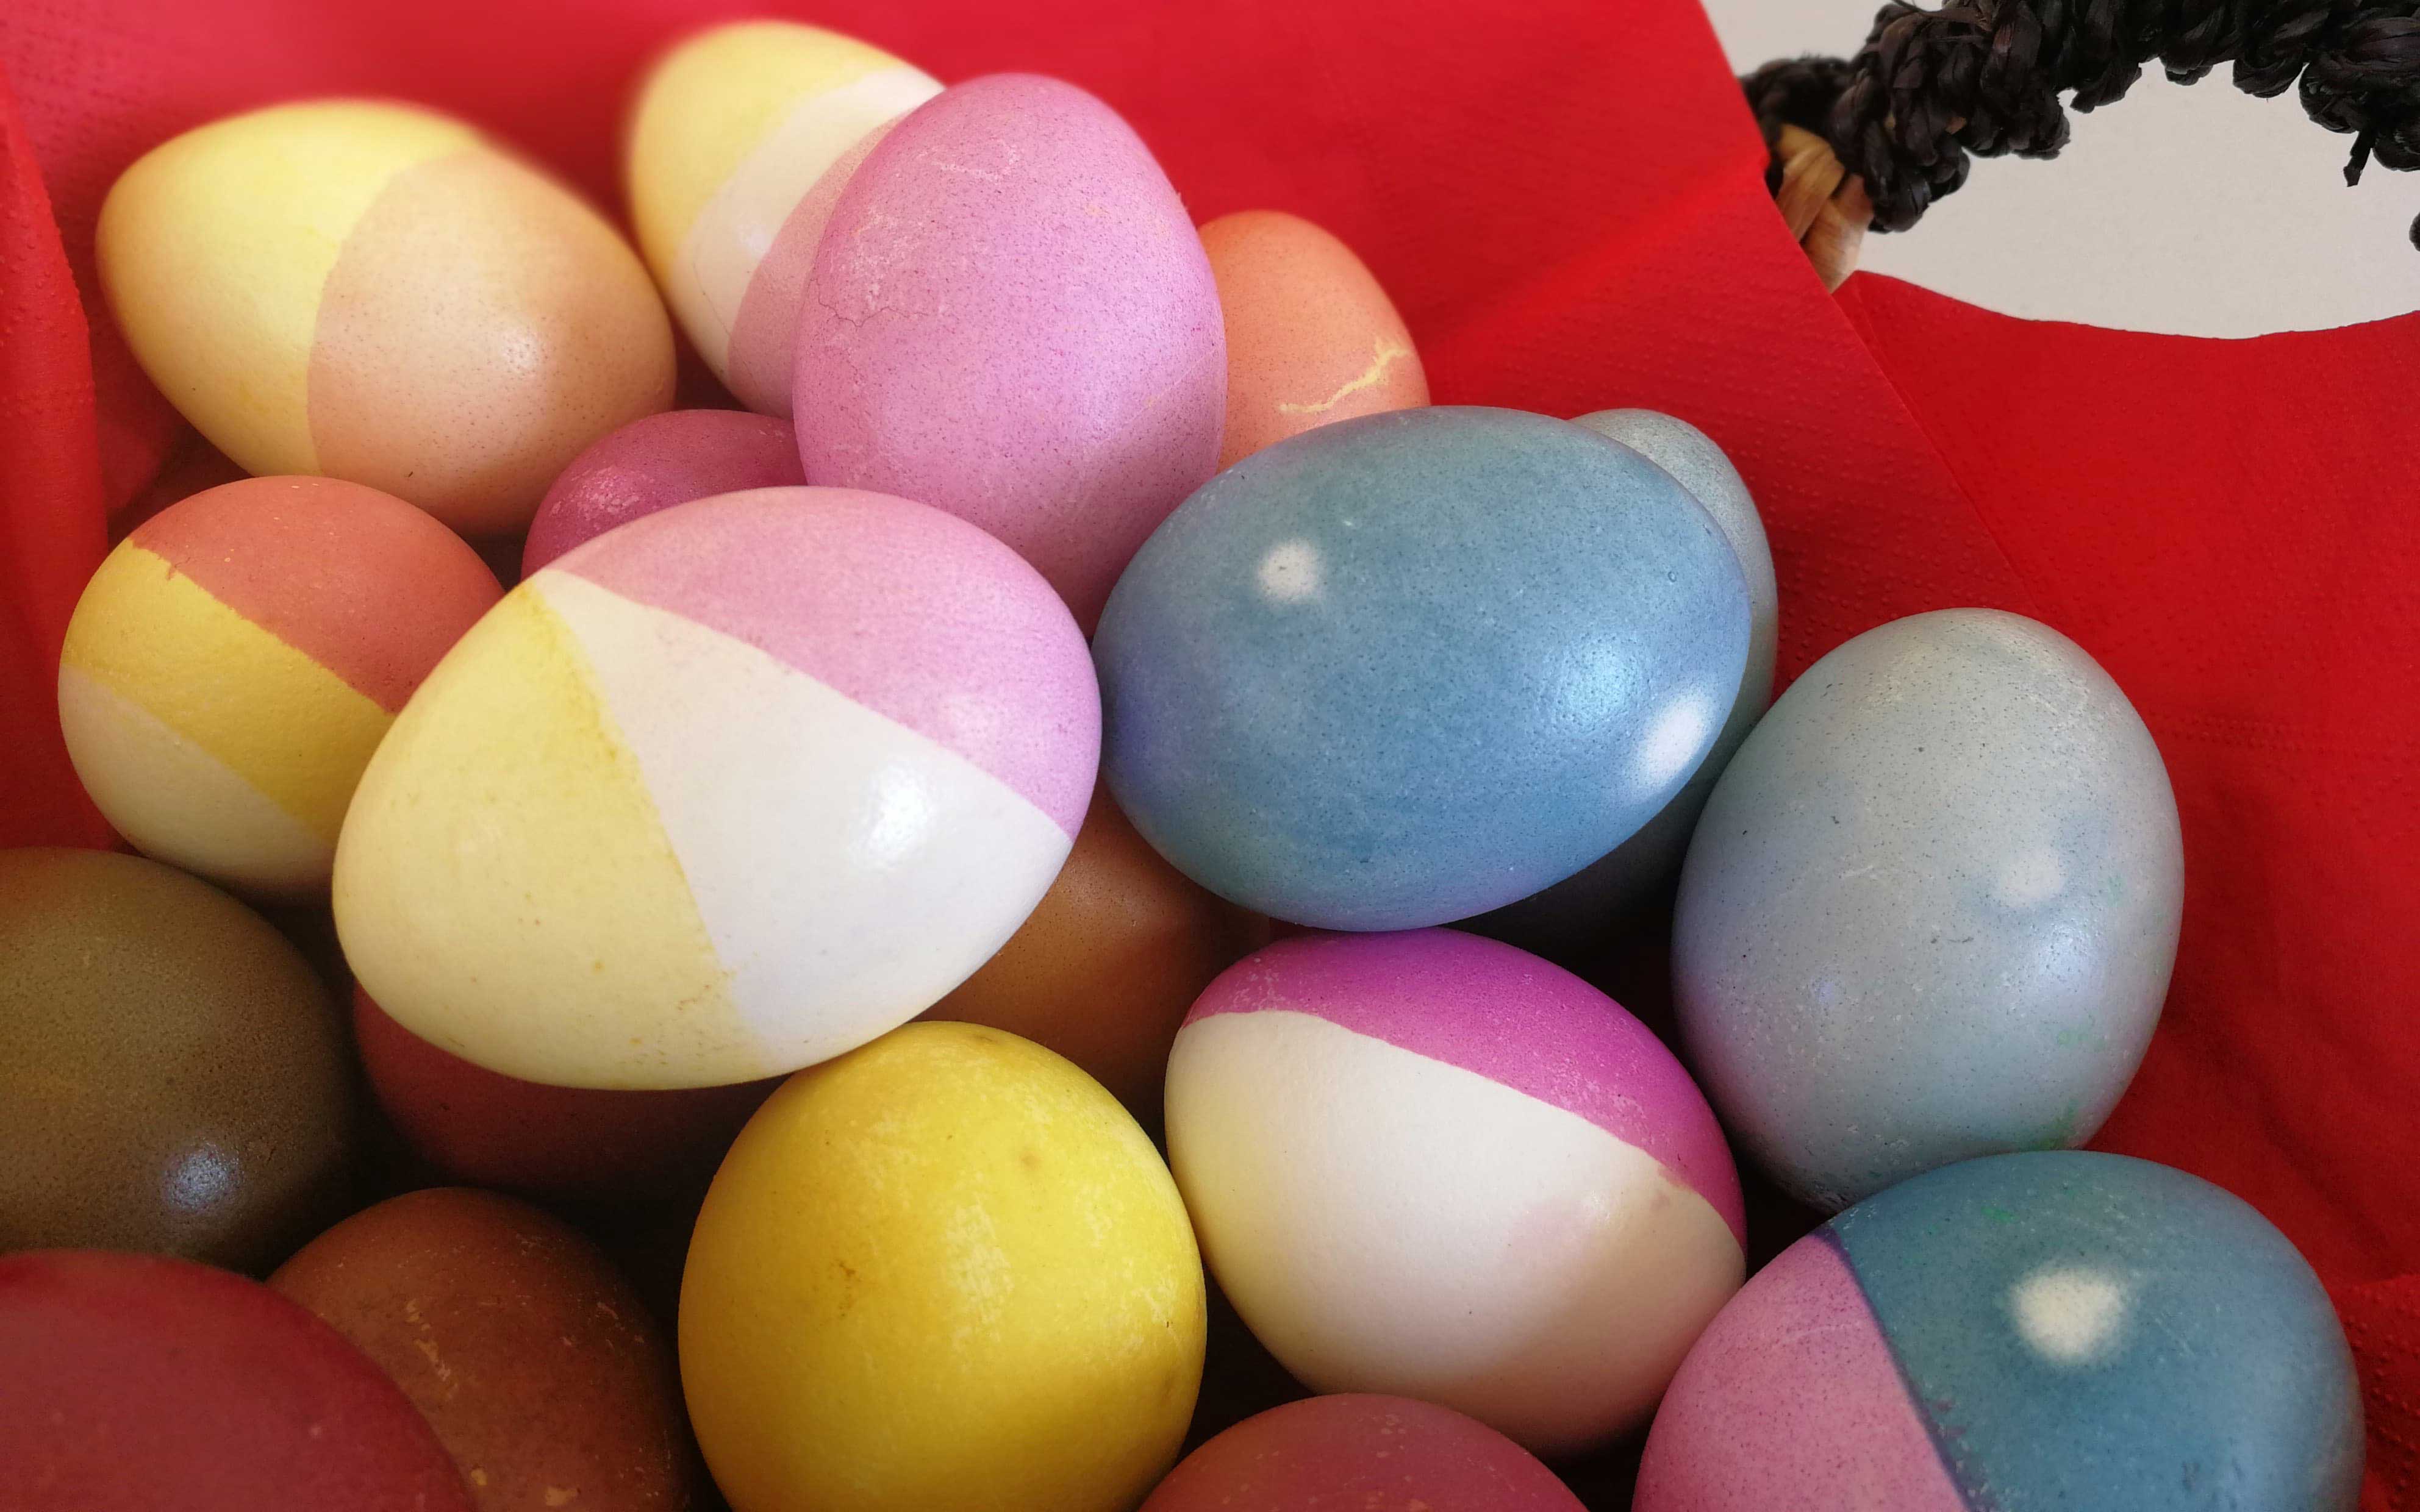
What the dyes looked like on white eggs.
© Paulina Björk Kapsalis

What the dyes looked like on brown eggs.
© Paulina Björk Kapsalis
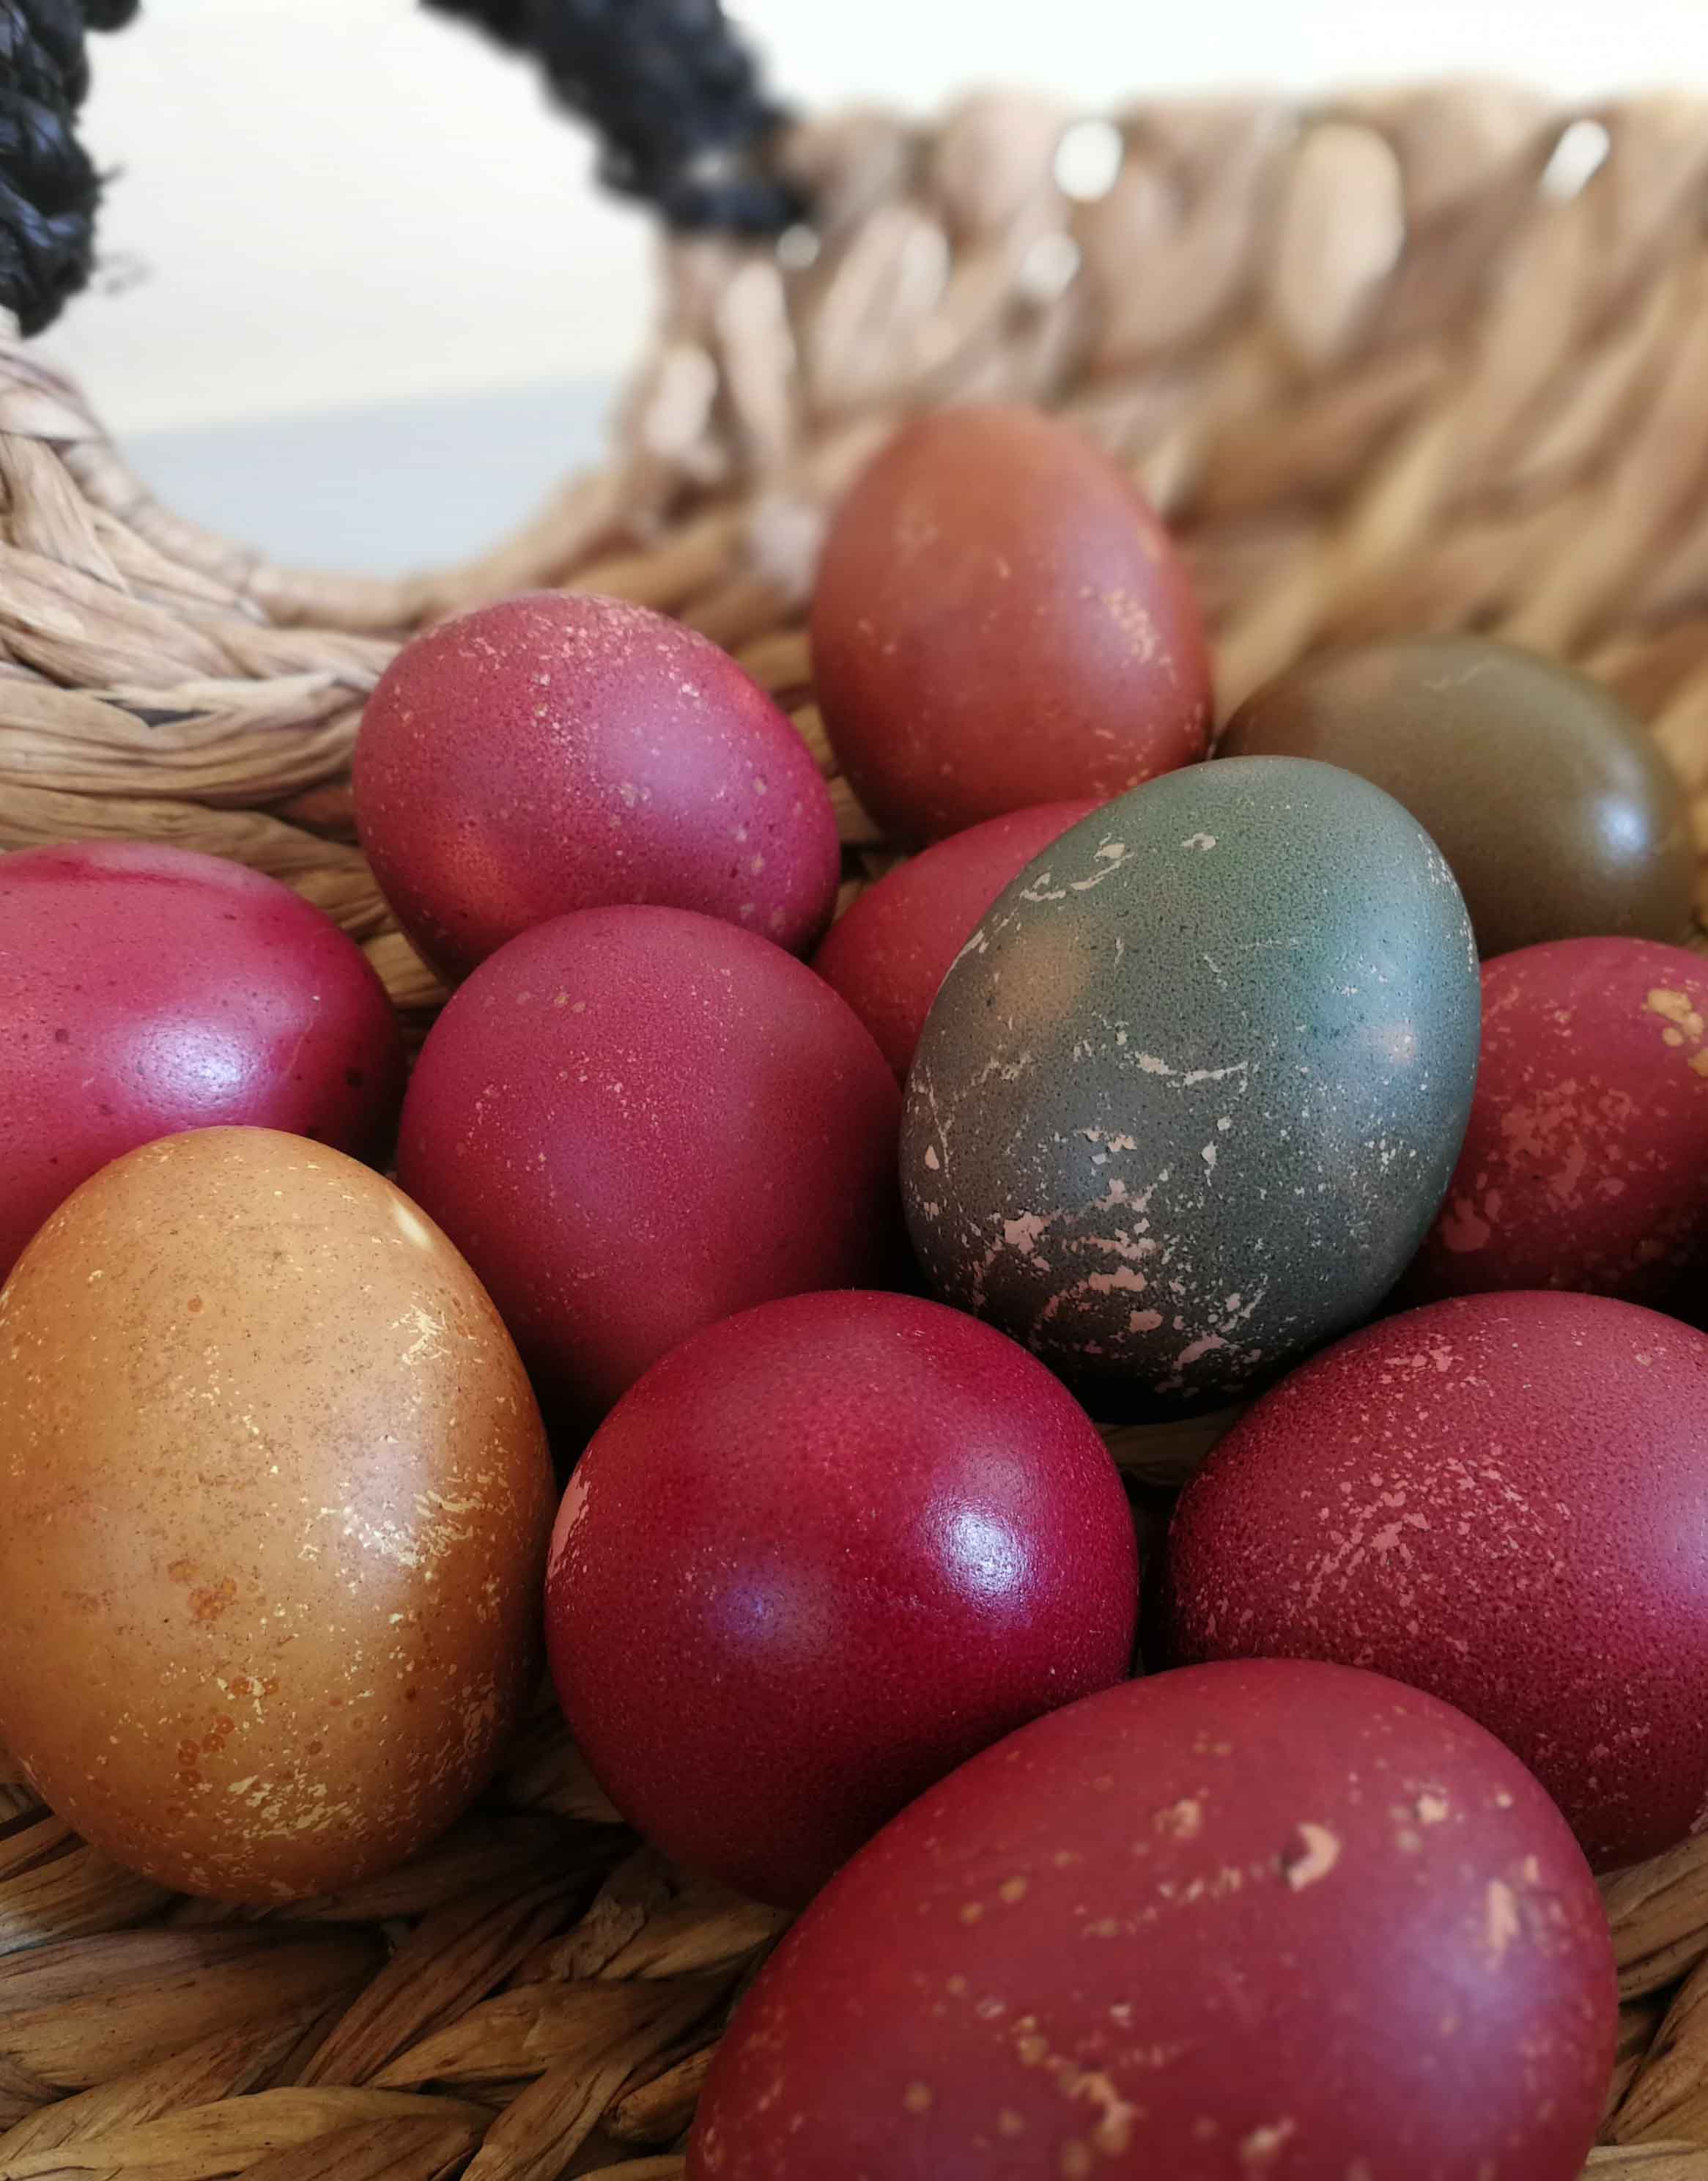
The white eggs did indeed turn pastel pink, blue, and yellow – pretty much as expected. The brown eggs on the other hand, while getting darker and deeper colors, also ended up with a lot more blemishes. When patting the dye off some of the brown eggs, the color would come off in many places, leaving the eggs looking freckled – kind of like naturally speckled eggs.
According to ye olde internet, tiny imperfections like unnoticeable cracks and particles stuck to the shells can cause splotchy eggs, so the spots on my brown eggs probably had less to do with their color, and more to do with their quality. To prevent spots, handle eggs carefully and rinse and wipe each egg after cooking. If you do end up with freckled eggs – stay positive, they’re still pretty.
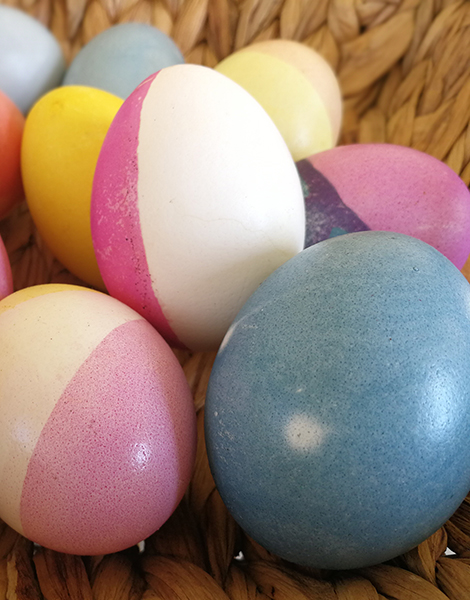
In general, natural dyes are a bit unpredictable. I learned that the same dye can turn one egg soft pink, and another almost purple. What’s lovely about it is that you get a range of unique looking eggs that carry much more character than a bowl of uniform red eggs.
Another thing I didn’t expect was the disappointing results of the onion peel dye. Since it is the most famous of the natural dyes I tried, I expected a good outcome and rich, rusty-red colored eggs. However, the white eggs just came out looking like brown eggs, and the brown eggs turned… a little browner. Thumbs down.
To poach the recipes I did like (get the yolk?), see below.
Natural dyes can be more unpredictable, but result in a unique looking batch of eggs.
© Paulina Björk Kapsalis
I made each of these dyes using 1 cup of water, which makes enough dye to soak 1-2 eggs at a time. Glass jars are great for dyeing a few eggs. To soak a batch of up to 12 eggs all at once, make at least 4 times the amount of dye.
For all the dyes, the eggs come first: Cook yours and let them cool. They should be hard-boiled.
To dye them, carefully place your eggs in the dye and then practice patience. Moving the eggs around in the dye or touching them before the color has really set may leave marks. Some dyes are strong enough to color your eggs within seconds or minutes, while other dyes need several hours. To make sure all your eggs take up as much color as possible, place the jars of dye and eggs in the refrigerator overnight. I experimented with the time for each dye. You can read about my results below.
After dying your eggs, carefully pat them down with paper towels, and leave them on a cooling rack to dry completely for a couple of hours. Then rub each egg with a few drops of vegetable oil to add shine.
Remember: wear plastic gloves to avoid staining your fingers. If attempting this with kids, I’d also recommend aprons.
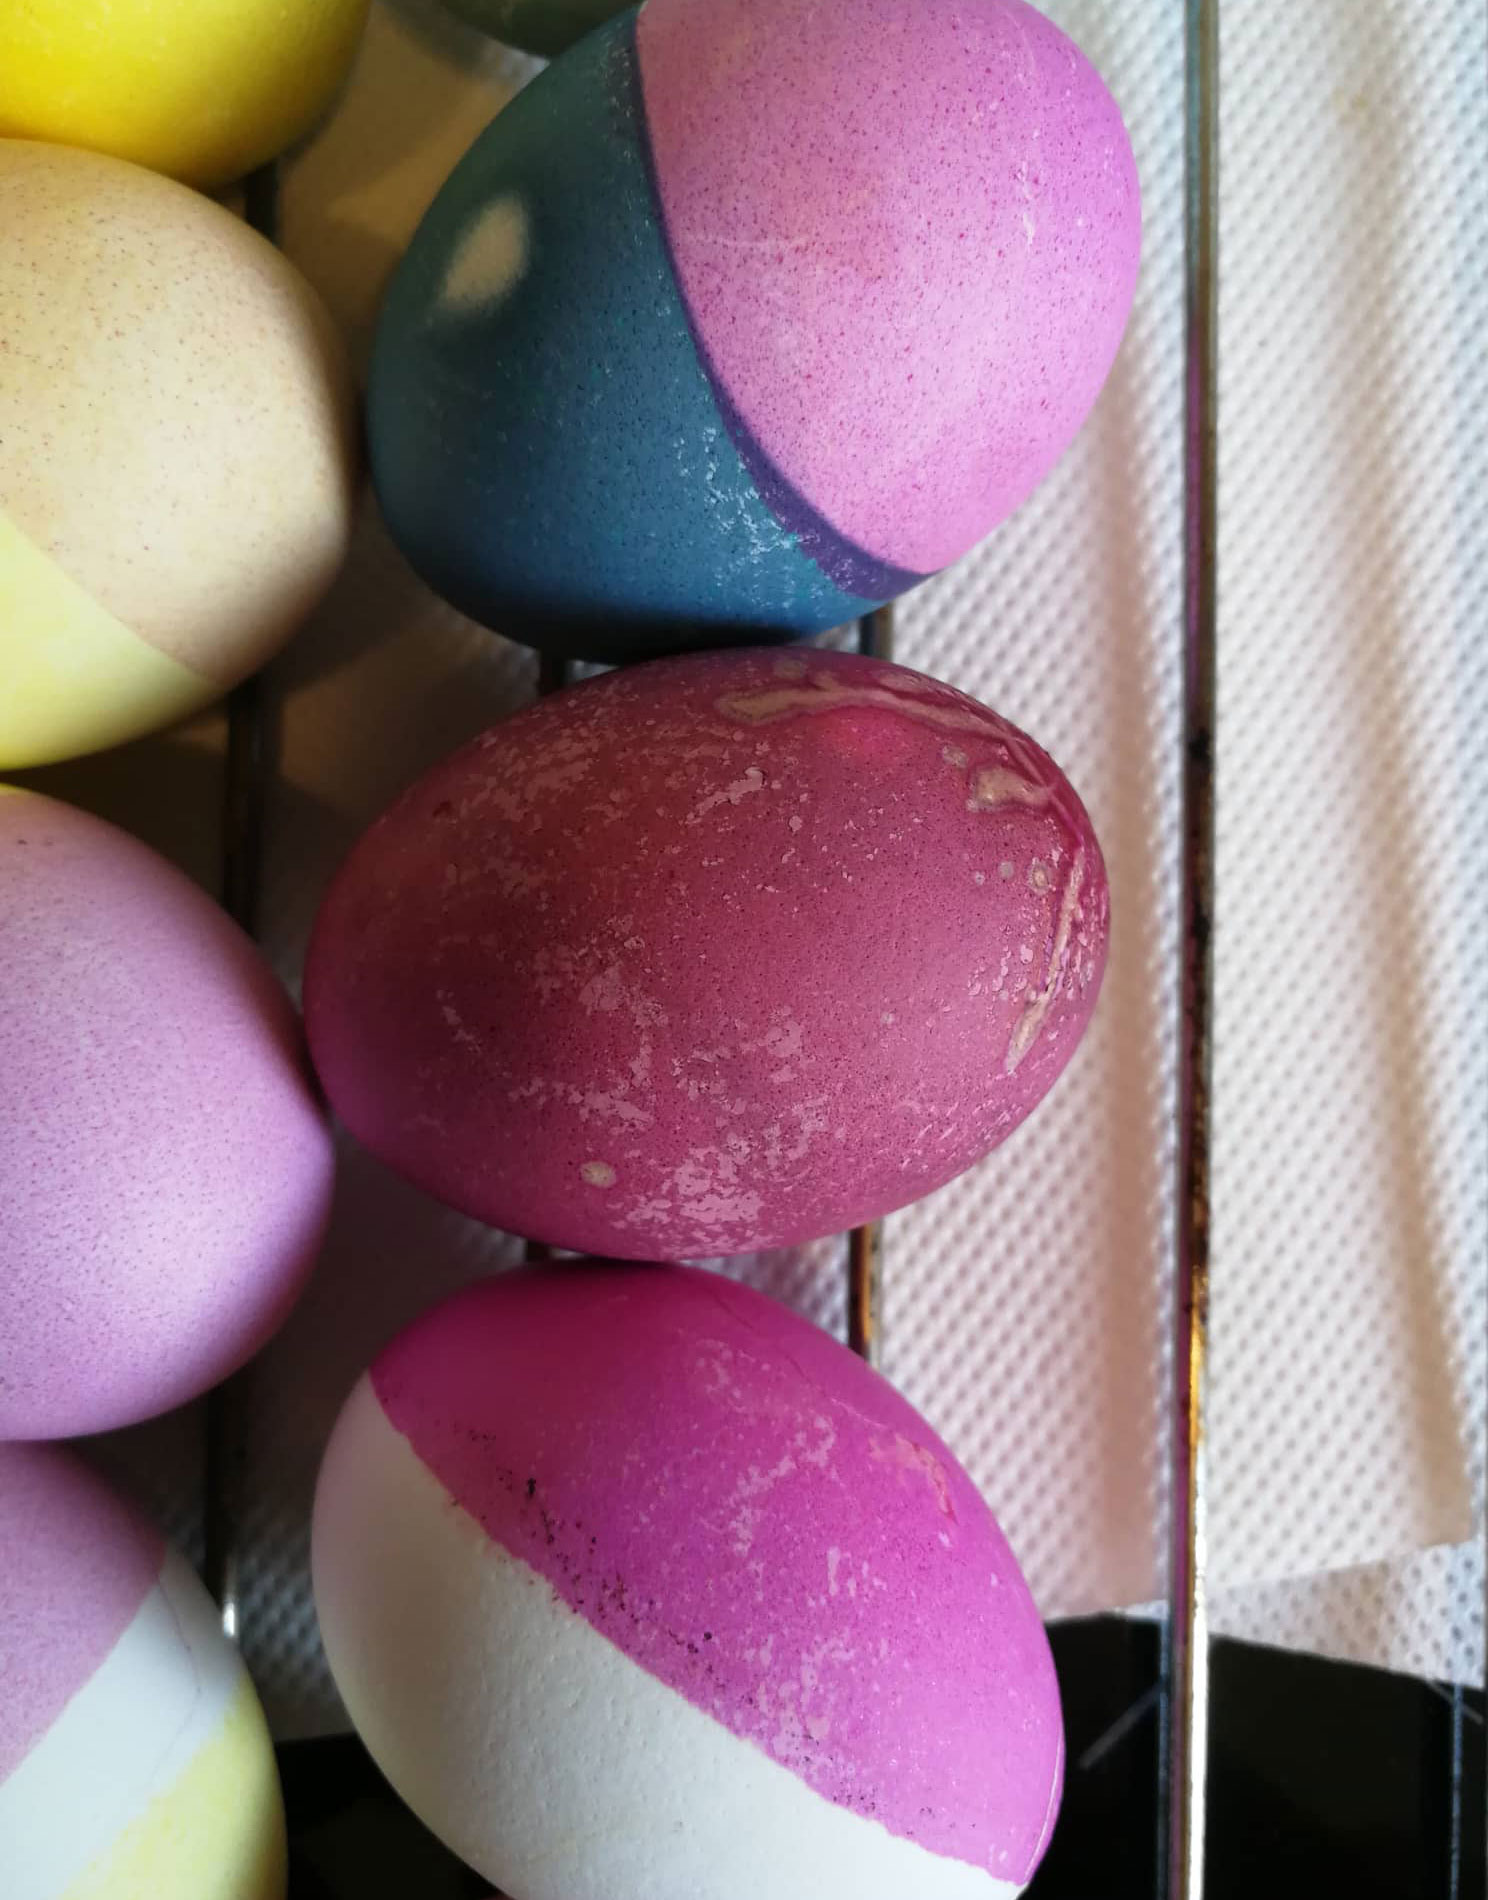
The red dye turned both white and brown eggs red in less than an hour. A quick dip turned white eggs pink.
© Paulina Björk Kapsalis
Red is the traditional color of Greek easter eggs.
© Paulina Björk Kapsalis
How to make the dye:
Add the shredded beets and the water to a saucepan and bring to a boil. Lower the temperature and let simmer for about 15 minutes. Strain into a glass jar, stir in the vinegar, and let cool.
Time required for this dye:
This was the most effective dye. Both brown and white eggs turned beautifully red in less than an hour in this dye, and a 10 second dip turned the white eggs pink. This is perfect for experimenting and dipping just parts of the egg. I dipped part of yellow eggs in the red dye to make them partly orange.
1 cup raw beets, shredded
1 cup water
1 tbsp white wine vinegar
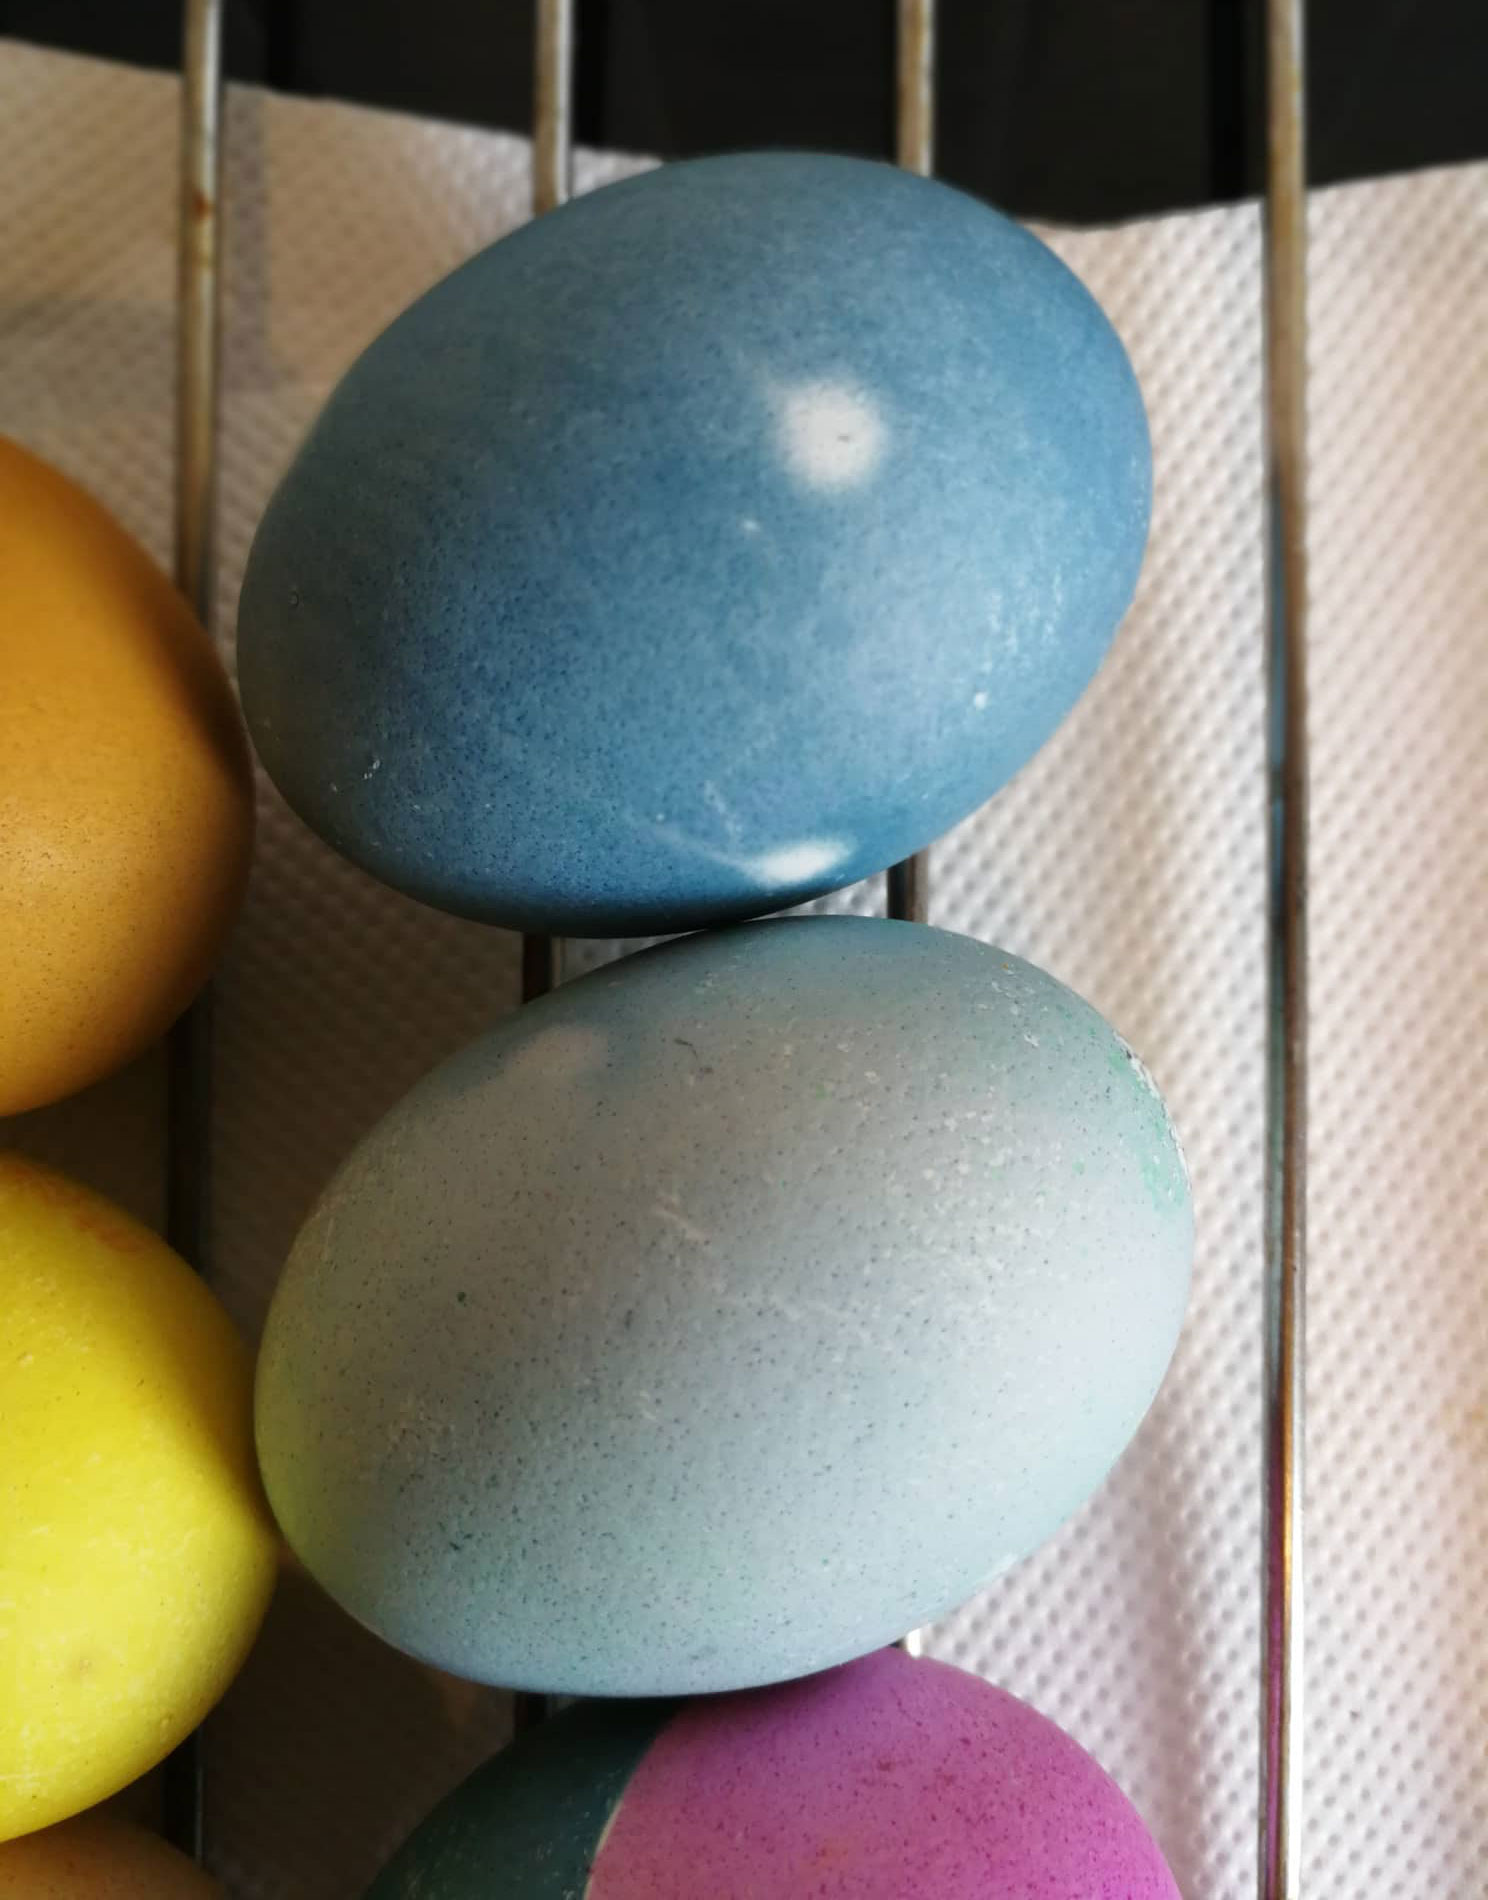
The results of the blue dye after 1 hour in the dye vs. over-night.
© Paulina Björk Kapsalis
A few blemishes on the blue eggs look like polka dots.
© Paulina Björk Kapsalis
How to make the dye:
Add the cabbage and the water to a saucepan and bring to a boil. Lower the temperature and let simmer for about 15 minutes. Strain into a glass jar, stir in the vinegar, and let cool.
Time required for this dye:
This dye turned out to be my favorite. While not very nice on brown eggs (they turned a very dark green/brown), it gave white eggs a gorgeous pastel blue. As a happy accident, the few blemishes on my blue eggs look like polka dots.
After about an hour in the blue dye, the eggs had turned a very light blue. I got the best results by leaving my eggs in the dye in the fridge overnight.
1 cup red cabbage, shredded
1 cup water
1 tbsp white wine vinegar
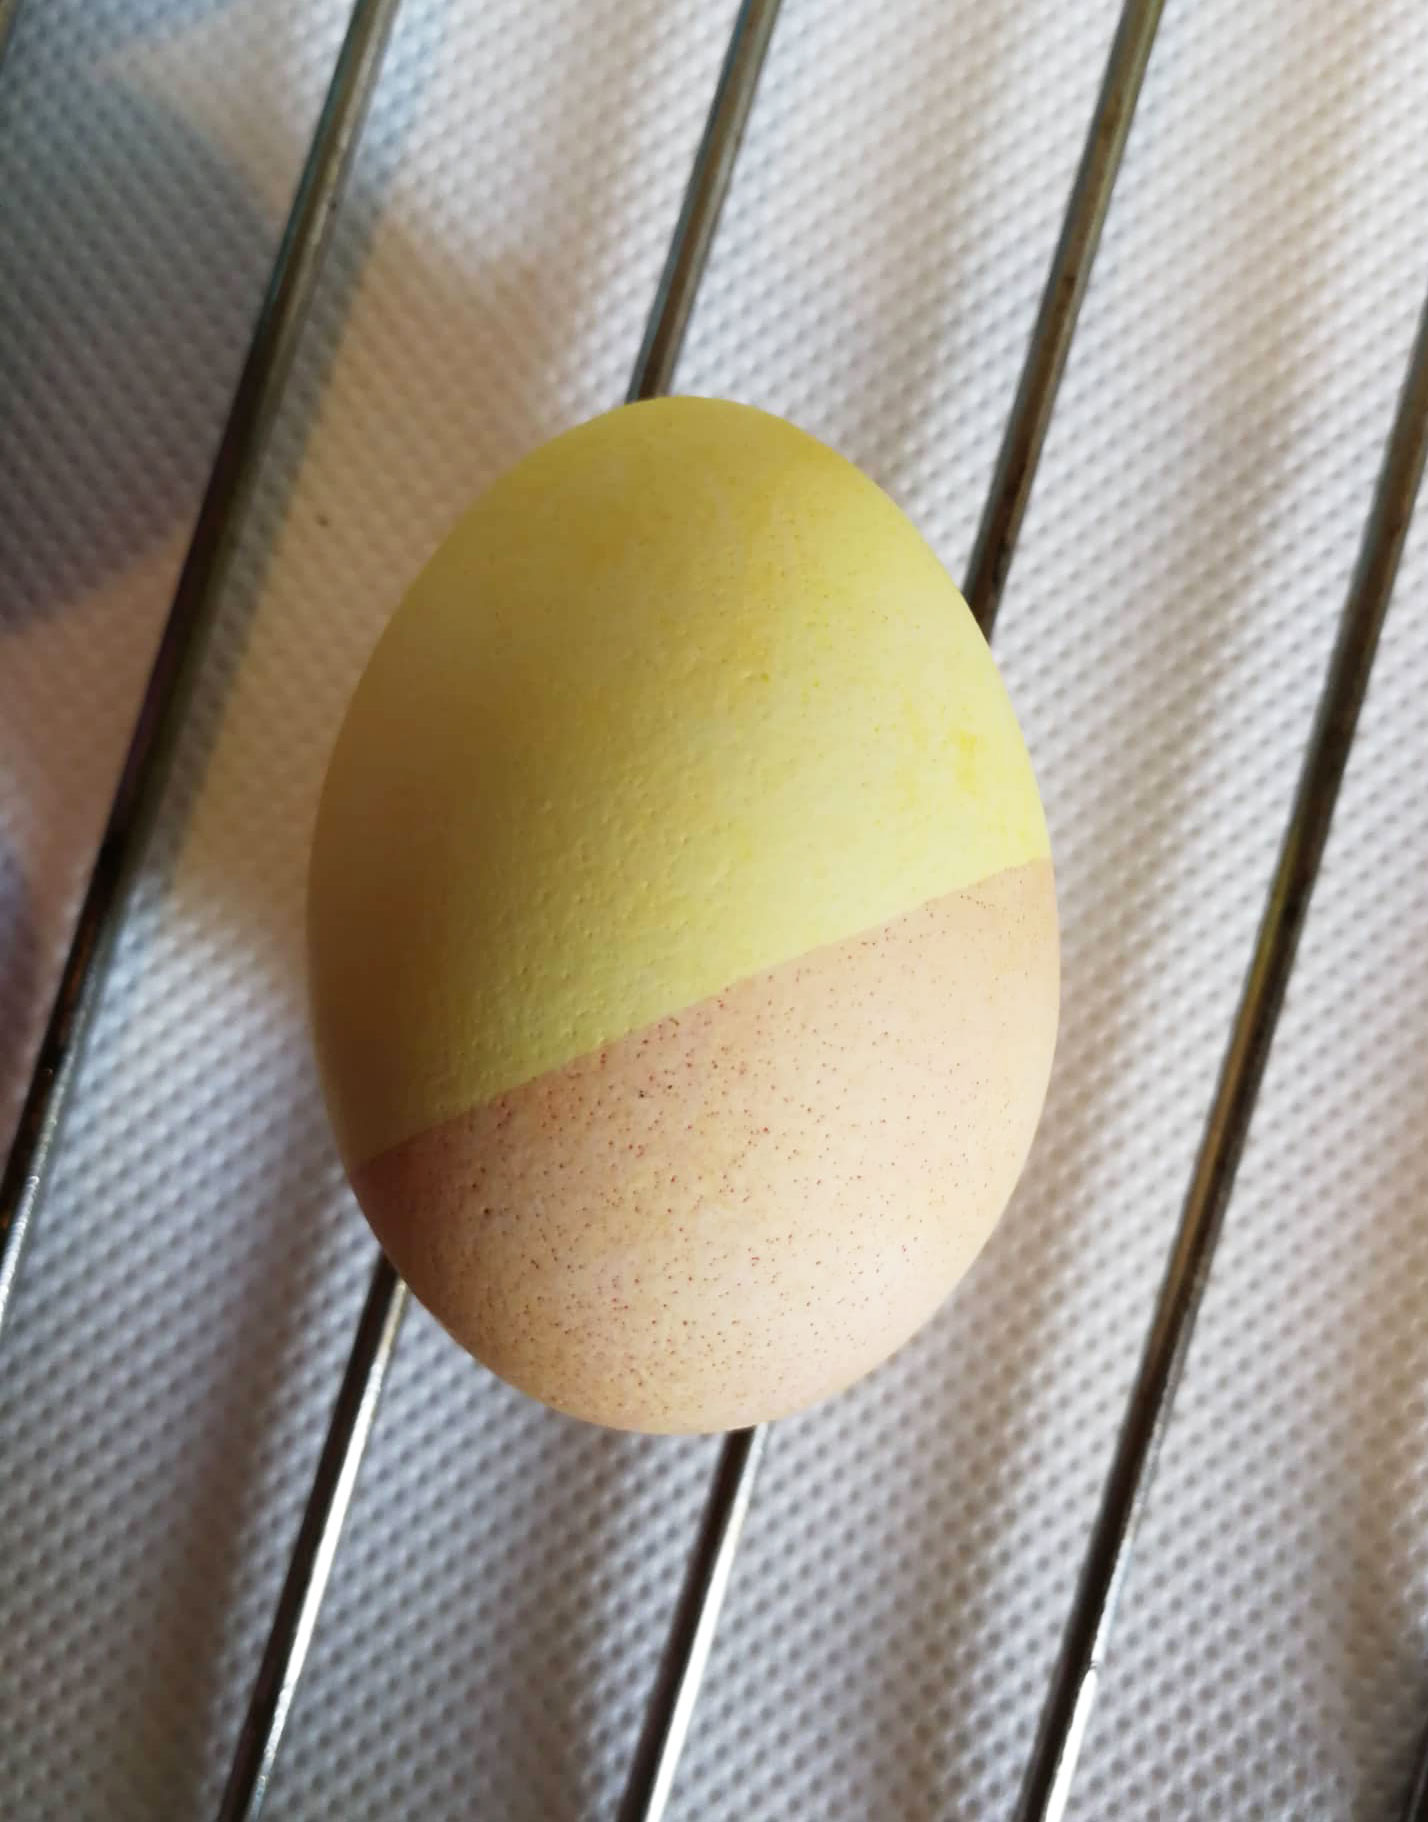
The results of the yellow dye on a brown vs. a white egg.
© Paulina Björk Kapsalis
Dip part of a yellow egg in red dye to turn it partly orange.
© Paulina Björk Kapsalis
How to make the dye:
Add the turmeric and the water to a saucepan and bring to a boil. Lower the temperature and let simmer for about 15 minutes. Strain into a glass jar, stir in the vinegar, and let cool.
Time required for this dye:
The yellow dye was less strong than the red/pink, but stronger than the blue. White eggs turned yellow while brown eggs turned a warm orange.
For bright yellow and orange, leave the eggs in the dye in the fridge overnight. For pastel yellow, leave white eggs in the dye for about an hour, or try repeatedly dipping the egg and patting it down between dips. The latter works well for coloring part of an egg.
2 tbsp turmeric
1 cup water
1 tbsp white wine vinegar
Rustic and nutritious, discover how Greece’s...

Sometimes, the heart just knows what...

Full of delicious flavors and happy...

A traditional recipe for galatopita, or...