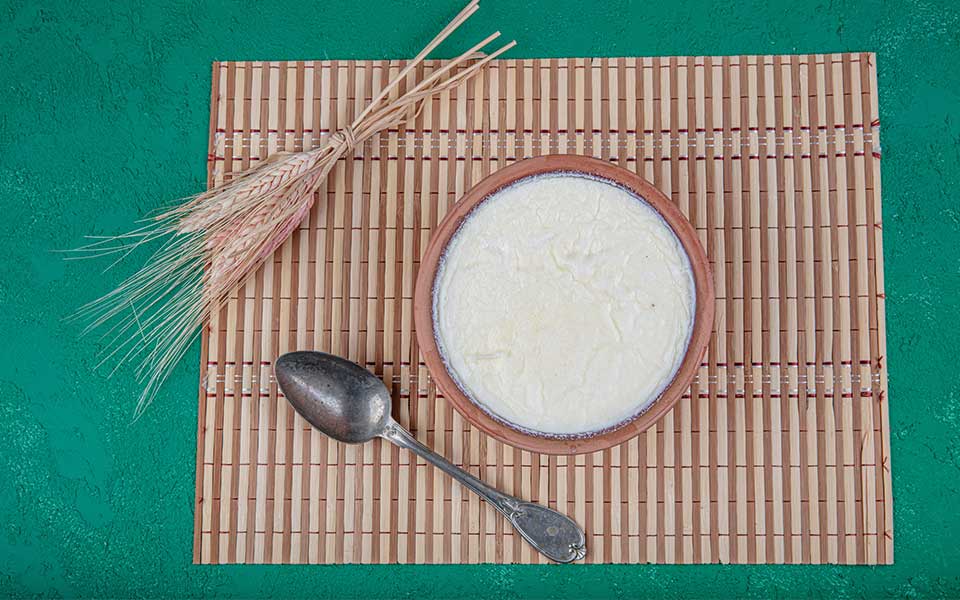
Made from curdled milk, yogurt is a thin cream that is made without any other ingredients. A light, refreshing dairy product that has a high nutritional value – it is particularly good for the peptic system. It can also be enjoyed by people who have an intolerance to milk.
Yogurt has been a staple in peoples’ diets since antiquity. It has been known in the Middle East, Central Asia, Egypt and the countries of the Caucasus for thousands of years. The Persians introduced it to India. The ancient Egyptians, Greeks and Romans also knew about yogurt, as testified by sources of the time (e.g., Herodotus, Galen, Pliny the Elder). In Europe, yogurt first appeared in the 16th century, but only began to spread widely in the first decades of the 1900s.
Yogurt can be made from any type of milk – cow, sheep, goat or buffalo milk – depending on the dietary habits and the animals that are reared in each region. In Greece, as in the Balkans, yogurt is traditionally made with sheep’s milk, which is thicker, while in Western Europe, yogurt is made with cow and goat’s milk. Today, as people are trying to adopt a healthier diet, skimmed and semi-skimmed milk are also used. Non-fat yogurt, however, thins easily, so stabilizers are used, the most innocent of which is gelatin. But we are interested in homemade yogurt.
© Food styling: Tina Webb, Assistant Food Stylist: Alexandra Tasounidou, Styling: Alice Bean, Photography: George Drakopoulos
Ingredients
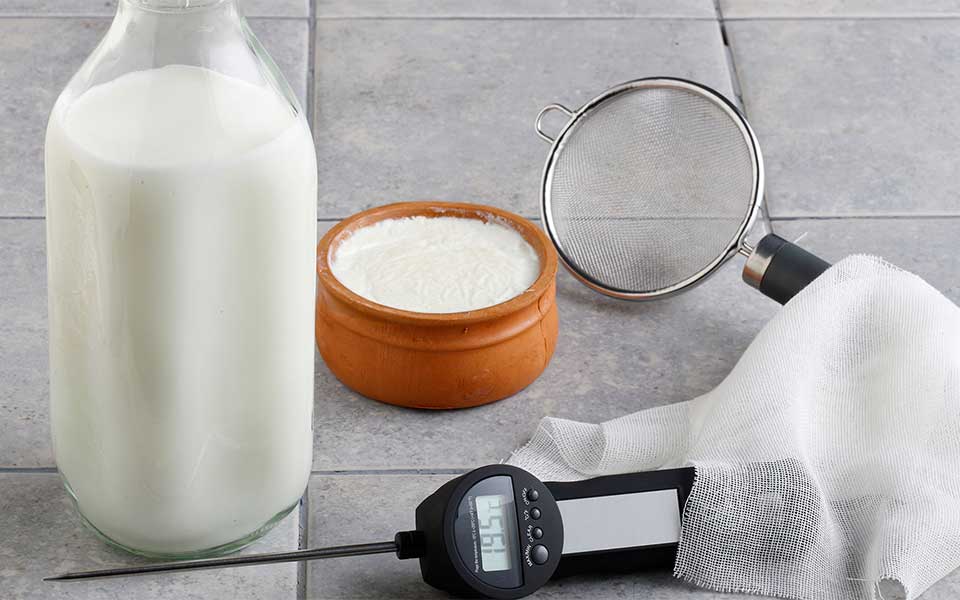
The first ingredient we need is milk, preferably fresh milk that has been recently drawn and has not been pasteurized. This presupposes that we have access to a stockyard or that we know a farmer. If we don’t have access to fresh milk, ordinary milk from the supermarket will also do. We can use sheep, goat or cow’s milk.
The second ingredient we need is a small amount of ready-made yogurt. We prefer yogurt that has the word “traditional” on the container and is topped with a skin, which will be removed. Sometimes, we hear people say that we need “yeast” to make yogurt, but they don’t mean the yeast that is used to raise bread. They use the word metaphorically. They’re referring to commercial yogurt that contains yeast. This yogurt has to be as fresh as possible. If it has an acidic taste, our yogurt will also have an acidic taste.
Quantities: One liter of milk produces one kilogram of yogurt. So, for three liters of milk, we will need one container of ready-made yogurt.
What we need
3 liters of milk
1 container of yogurt
A thermometer
A strainer
A cheesecloth
How to make homemade yogurt, step-by-step
© Food styling: Tina Webb, Assistant Food Stylist: Alexandra Tasounidou, Styling: Alice Bean, Photography: George Drakopoulos
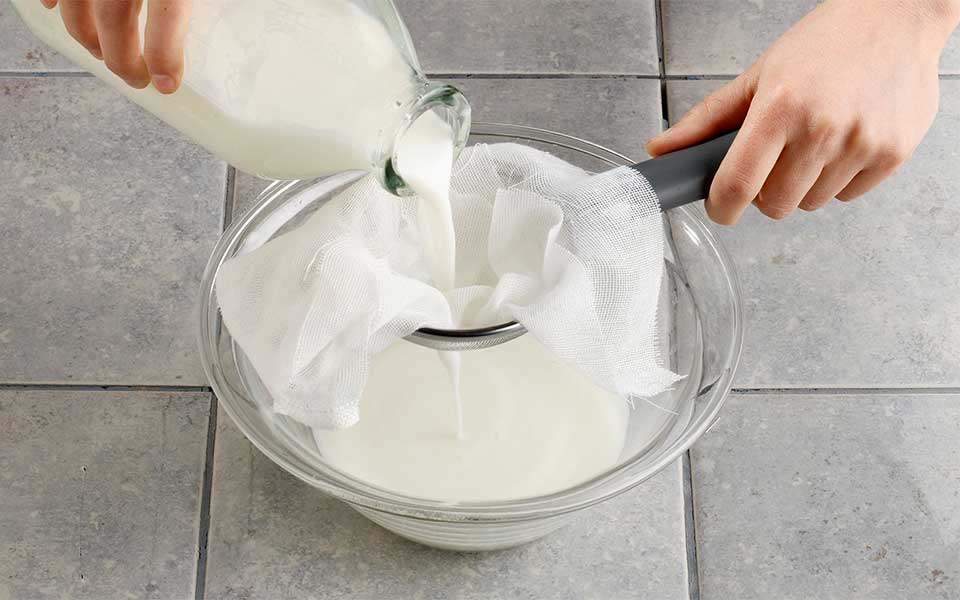
Sieve the milk through the strainer that is lined with two layers of cheesecloth.
© Food styling: Tina Webb, Assistant Food Stylist: Alexandra Tasounidou, Styling: Alice Bean, Photography: George Drakopoulos
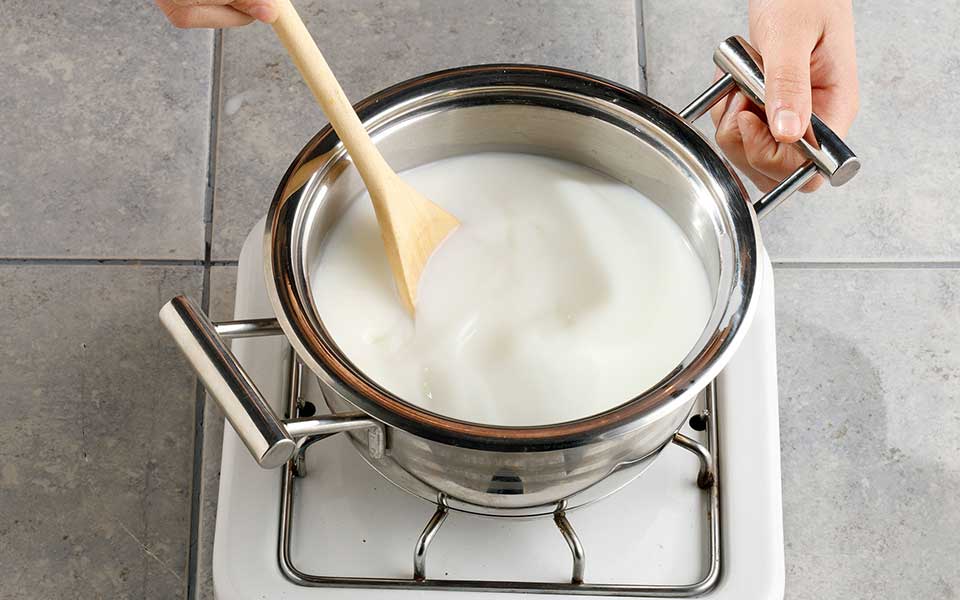
Pour the milk into a stainless steel or enameled pot and boil it. Make sure to stir the milk constantly so that it doesn’t stick or get burnt on the bottom of the pot and a skin doesn’t form on the top.
When the milk has boiled for 1-2 minutes, remove the pot from the stove and set it aside to cool.
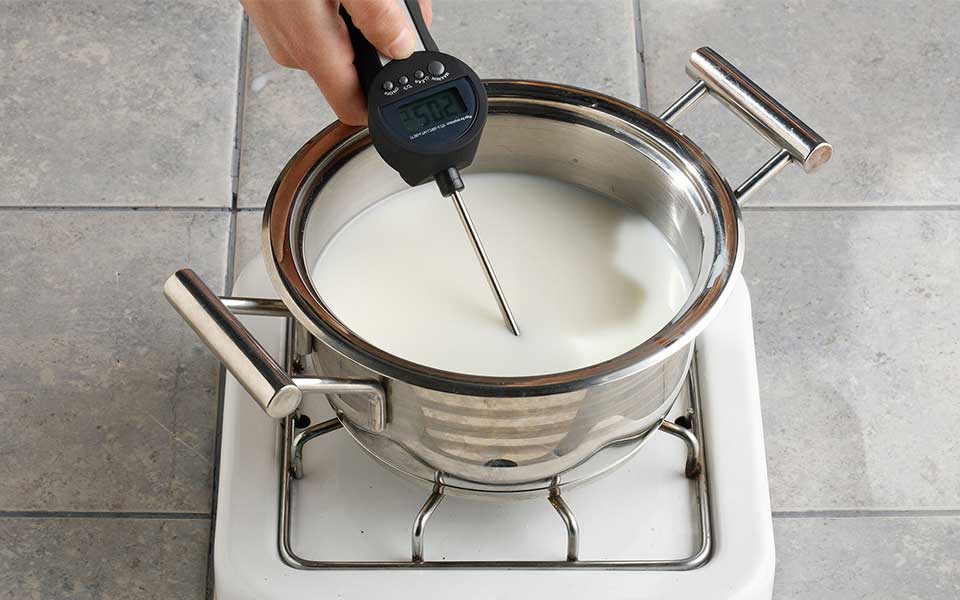
© Food styling: Tina Webb, Assistant Food Stylist: Alexandra Tasounidou, Styling: Alice Bean, Photography: George Drakopoulos
In order for the milk to curdle, it has to reach 45° to 46°C.
© Food styling: Tina Webb, Assistant Food Stylist: Alexandra Tasounidou, Styling: Alice Bean, Photography: George Drakopoulos
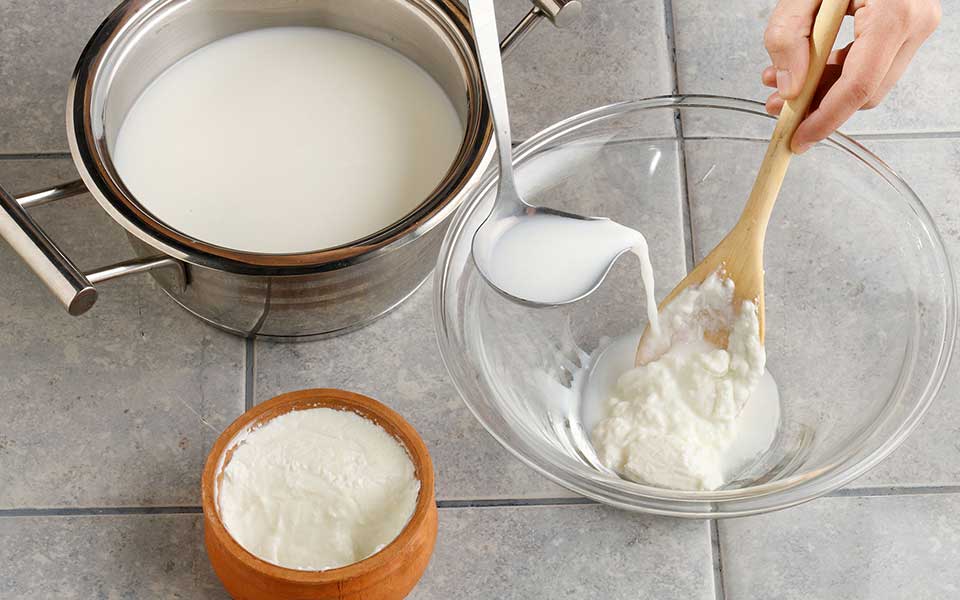
Αdd the ready-made yogurt in a bowl and thin it with some of the tepid milk.
Thin the ready-made yogurt entirely by beating it with a wooden spoon until it becomes uniform.
Pour the remainder of the milk from the pot into a large receptacle – preferably a clay vessel – and add the thinned yogurt mixture.
Stir with a wooden spoon, so that the yogurt mixture spreads evenly throughout the milk.
© Food styling: Tina Webb, Assistant Food Stylist: Alexandra Tasounidou, Styling: Alice Bean, Photography: George Drakopoulos
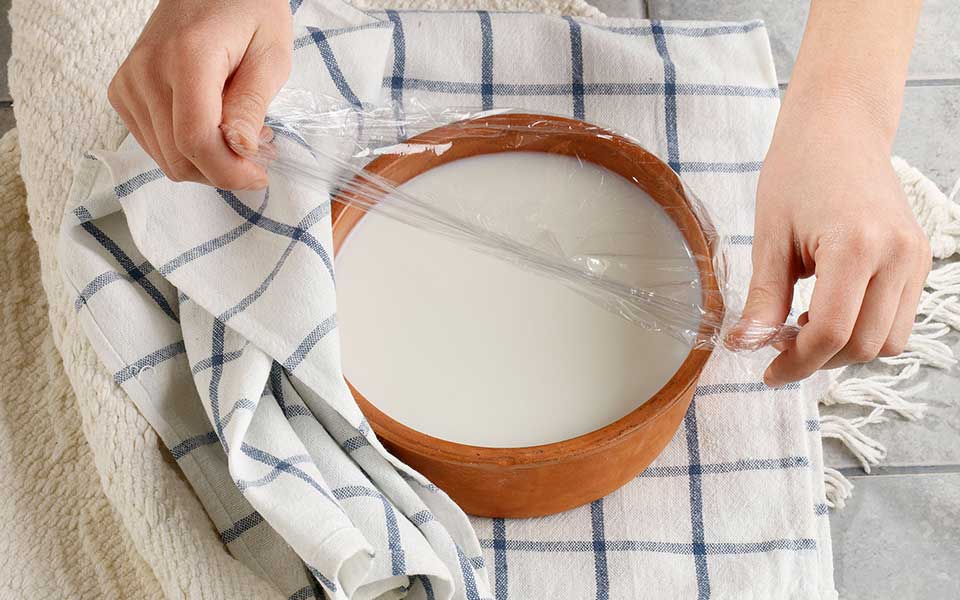
Close the receptacle with its lid or cover it with saran wrap (cling film). The receptacle must remain wrapped and placed in a warm area without air currents and must not be moved at all. It’s best to allow the yogurt to set in one place. You’ll need a large towel or small tablecloth and a wool blanket. Place the receptacle with the milk on the towel with the blanket. Once you have stirred the milk, wrap the receptacle and do not move it until the fermentation period is over.
After 6 hours, unwrap the container or vessel and check to see if the yogurt is ready. If it is not ready (highly improbable), cover it up again and check it in 1 – 2 hours.
Once the yogurt has hardened, remove the towel and blanket. Leave the yogurt out until it reaches room temperature and then place it in the refrigerator. If you want to make more yogurt at a later time, put an amount of the yogurt you have made in a jar, seal it tightly and store it in the refrigerator. The jar of yogurt can remain stored for one week.
Attention: Never store yogurt in the freezer.
Useful information
The texture and acidic taste of yogurt are due to two bacilli (bacteria) that develop and multiply as a result of the particularly high temperature that is needed to make it. The quality and taste of yogurt are directly related to the type of feed the animals are given, which also affects the milk they produce. With the method described above, a layer of skin does not form on the surface of the yogurt.
As the milk cools to reach 45°C, a layer of creamy skin is formed which is due to the fat that rises to the surface. However, as we stir the yogurt in the milk, we don’t allow any skin to form. If you want yogurt with skin, you need to add the thinned yogurt in the milk with a large syringe. Then, stir the mixture with a large wooden spoon. Place the end of the spoon in the pot and stir under the surface of the skin, making sure that you do not break the skin up. Only goat’s milk doesn’t create skin because it is homogenized by its nature and its fats don’t break up.
A tip: When you scoop out part of the yogurt you want, a small pool of liquid (whey) is left behind. To remove the whey, add a piece of rusk. Once the rusk has absorbed the whey, you can throw it away.
Sack yogurt
To make thick, strained yogurt, place the freshly-curdled milk (or part of the freshly-curdled milk) in a sack made of cloth and hang it over a basin. As the sack hangs over the basin, the whey will drain through the sack leaving only the thick yogurt. A sack made of cheesecloth should not be used because it will not be able to contain the yogurt. A pillowcase can also be used.
About the Author: The late Evi Voutsina (1950-2013) was an acclaimed chef and food writer and a leading figure in the documentation and preservation of traditional Greek cuisine. This article was first published in Greek in gastronomos.gr.


